

Introduction :
In Salesforce, Lightning Web Components (LWC) are the go-to for building modern, performant user interfaces. However, when it comes to calling LWC from list views buttons with selected record IDs, there are certain limitations:
No Direct LWC Invocation from List View Buttons: Salesforce does not allow you to call an LWC directly from a list view button. This is similar to the restriction with vf pages.
- No Direct LWC Invocation from List View Buttons: Salesforce does not yet allow you to directly call an LWC from a list view button, like vf pages.
- No way to directly pass selected record ids in LWC Invocation from List View URL Buttons -While you can call an LWC using a custom URL button, Salesforce does not currently support passing the selected record IDs directly to the LWC as URL parameters.
This creates difficulties for scenarios where users need to perform actions on a set of selected records from a list view. Examples include bulk updates or initiating complex operations. Calling LWC from list views is a feature often requested by Salesforce users. However, we must rely on creative workarounds until it’s natively supported.
In this blog, we’ll explore alternative approaches to work around these limitations and achieve the desired functionality. Specifically, we’ll look at two popular methods and their pros and cons for calling LWC from list views.
1. Using Screen Flow Called Through a List View URL Button
Overview:
This method utilizes a URL button to invoke a Salesforce screen flow. The selected record IDs are passed to the flow using the ids variable. Inside the flow, you can either handle the operation directly or call an LWC for more advanced functionality.
a) Example Use Case: Requirement Needs LWC Inside the Flow
Consider a scenario where the flow needs custom UI elements, such as mass approving opportunities by putting a common approval comment, an LWC can be embedded in the flow to handle the complexity. The flow collects the record IDs, which the LWC processes further.
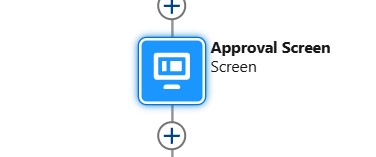
Lets see below example screen flow Opportunity_SCR_MassApprove, which is designed to enable mass approval of opportunities directly from the opportunity list view using a custom “Mass Approve” button. This flow calls an LWC inside the screen by passing selected opportunity records and allow the users to mass approve opportunities with approval comments.
Demo –
Step 1 – Create Mass Approval LWC like below :
This lightning web component has the below functionality –
- Displays approval comment input and action buttons if eligible records exist.
- Shows a “No eligible records” message with a return button if no records are available.
- Provides a
lightning-textareafor entering comments associated with the approval action. - Has “Approve All” button to trigger the approval process.
- Has “Cancel” or “Return to List View” buttons to return back to list view.
massApproveOppLWC.html
<template>
        <template lwc:if={validOppExists}>
            <div class="slds-m-around_medium">
                <lightning-textarea
                    label="Approval Comment"
                    placeholder="Enter your approval comment"
                    value={approvalComment}
                    onchange={handleCommentChange}>
                </lightning-textarea>
            </div>
            <div class="slds-m-around_medium" style="float: right;">
                <lightning-button
                    label="Approve All"
                    variant="brand"
                    onclick={handleApproval}>
                </lightning-button>
            </div>
            <div class="slds-m-around_medium" style="float: right;">
                <lightning-button
                    label="Cancel"
                    variant="brand"
                    onclick={returnToListView}>
                </lightning-button>
            </div>
        </template>
        <template lwc:else>
            No eligble records.
            <div class="slds-m-around_medium" style="float: right;">
                <lightning-button
                    label="Return to list view"
                    variant="brand"
                    onclick={returnToListView}>
                </lightning-button>
            </div>
        </template>
</template>
massApproveOppLWC.js
import { LightningElement, api, wire, track } from 'lwc';
import approveRecords from '@salesforce/apex/MassApproveOpp_Controller.bulkApprove';
import { FlowNavigationFinishEvent } from 'lightning/flowSupport';

export default class MassApproveOppLWC extends LightningElement {
    approvalComment = '';
    @api inputValueList = [];
    @track validOppExists;

    connectedCallback() {
        this.validOppExists = this.inputValueList.length > 0 ? true : false;
    }

    finishFlow() {
        this.dispatchEvent(new FlowNavigationFinishEvent());
    }

    returnToListView() {
        try {
            this.finishFlow();

        } catch (error) {
			console.log('error+++'+error);
        }
    }

    // Handles input change for the approval comment
    handleCommentChange(event) {
        this.approvalComment = event.target.value;
    }

    // Handles the approval action
    handleApproval() {
        // Call Apex method to approve records
        approveRecords({ records: this.inputValueList, comment: this.approvalComment })
        .then(() => {
            this.finishFlow();
        })
        .catch((error) => {
            this.finishFlow();
			console.log('error+++'+error);
        });
    }
}
massApproveOppLWC.js-meta.xml
<?xml version="1.0" encoding="UTF-8"?>
<LightningComponentBundle xmlns="http://soap.sforce.com/2006/04/metadata">
    <apiVersion>62.0</apiVersion>
    <isExposed>true</isExposed>
    <targets>
        <target>lightning__FlowScreen</target>
    </targets>
    <targetConfigs>
        <targetConfig targets="lightning__FlowScreen">
            <propertyType name="T" extends="SObject" label="Input Type"
                description="Generic sObject data type used for input sObject properties" />
            <property name="inputValueList" type="{T[]}" label="input value List" role="inputOnly" />
        </targetConfig>
    </targetConfigs>
</LightningComponentBundle>
MassApproveOpp_Ctrl
public class MassApproveOpp_Ctrl {
    @AuraEnabled
    public static String bulkApprove(List<Opportunity> records, String comment) {
        Map<String, Object> response = new Map<String, Object>();
        try {
            List<Approval.ProcessWorkitemRequest> requests = new List<Approval.ProcessWorkitemRequest>();
            List<ProcessInstanceWorkitem> workItems = [SELECT Id, ProcessInstanceId FROM ProcessInstanceWorkitem WHERE ProcessInstance.TargetObjectId IN :records ];
            System.debug('workItems+++'+workItems);
            for(ProcessInstanceWorkitem workItem : workItems){
              Approval.ProcessWorkitemRequest req = new Approval.ProcessWorkitemRequest();
              req.setWorkitemId(workItem.Id);
              req.setAction('Approve');
              req.setComments(comment);
              requests.add(req);
            }
            Approval.ProcessResult[] processResults = Approval.process(requests);
        } catch ( Exception ex ){
            response.put('status', '500');
            response.put('error', ex.getMessage());
            return JSON.serialize(response);
        }
        response.put('status', '200');
        response.put('msg', 'Records Approved Successfully');
        return JSON.serialize(response);
    }
}
Step 2 – Create a screen flow :
Go to setup , flow and create a new screen flow as :
Label – Screen Flow: Mass Approve Opportunities and Api Name – Opportunity_SCR_MassApprove.
Download Flow xml below, which you can import in your org :
The flow has the below features –
- The flow accepts a list of opportunity IDs (ids) as input, representing the records selected in the list view.
- Using the Get Records element, the flow retrieves all opportunities matching the provided IDs where the approval status is “Submitted.”
- The retrieved opportunities are then passed to a custom Lightning Web Component (LWC) named
MassApprovalLWC. - The LWC presents an approval comment section where users can enter a comment. Upon submitting the comment and approving, the LWC processes the approval for all selected opportunities.


Step 3 – Create a list view url button on Opportunity like below :
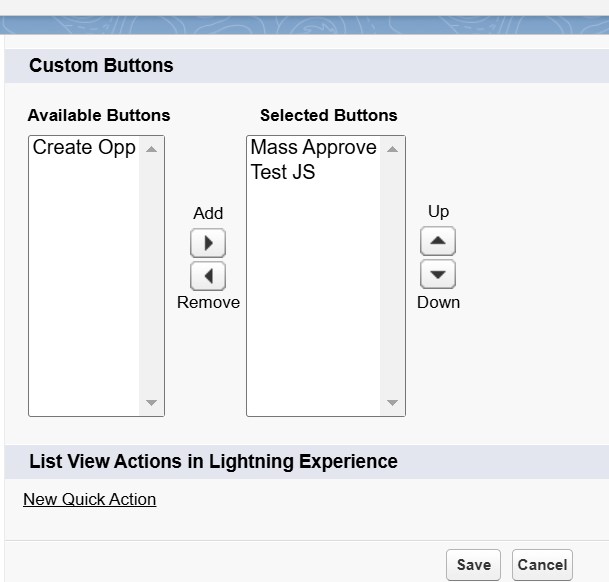
a) Create List View URL Button – Go to setup and open opportunity object, then click on Button, Links and Actions and click on “New Button or Link” button, to create a list view button named “Mass Approve” as below –
Enter the url like – /flow/{yourscreenflowname}?retURL={SobjectRelatedListURL}
e.g.
/flow/Opportunity_SCR_MassApprove?retURL=006/o
Note – You will not be able to redirect to a url from LWC, using navigation service in this approach, so you need to specify return url in list view button url as above.

b) Add the list view button to List View Button Layout

b) Example Use Case: Requirement Handled only in the Flow without LWC
Consider a scenario where the requirement is to change the status of multiple cases based on user input. This can be achieved entirely within the flow by iterating over the record IDs and performing updates.
Lets see below example screen flow Case_SCR_MassClose which is designed to enable mass close of cases directly from the cases list view using a custom “Close Cases” button. This flow process the selected cases records and allow the users to close them with close status and internal comments.
Bonus Tip : This approach can be used in both List View and Related List Button
Demo –
Step 1 – Create a screen flow :
Go to setup , flow and create a new screen flow as :
Label – Screen Flow: Mass Close Cases and Api Name – Case_SCR_MassClose
Download example Flow xml below, which you can import in your org :
The flow has the below features:
- The flow accepts a list of Case IDs (
ids) as input, representing the records selected in the list view. - Displays a screen to collect optional fields like “Close Reason” and “Internal Comments” for closing the cases.
- Utilizes a loop (
Loop_Cases) to iterate through each Case ID in the input list. - Within each iteration, the following operations are performed:
- The
Set_Case_Closure_Detailsassignment sets theStatusof the current Case to “Closed.” - Collects the updated Case into a collection variable (
Cases_To_Close).
- The
- After the loop completes, the
Close_Caseselement updates all Cases in theCases_To_Closecollection to the status “Closed.” - On completing the update, the flow ends, marking all selected Cases as closed.


Step 2 – Create a list view url button on Case like below :
a) Create List View URL Button – Go to setup and open case object, then click on Button, Links and Actions and click on “New Button or Link” button, to create a list view button named “Close Cases” as below –


b) Add the list view button to List View Button Layout


Pros:
- Less Apex Code: Flows can handle many use cases declaratively.
- Modern Approach: Fully compatible with Lightning and aligns with Salesforce’s push for declarative tools.
- Dynamic UI: Embedding LWC inside the flow allows for advanced interactivity.
Cons:
- Slower Load Time – The flow called from url, takes time to load, as its launched from different origin in lightning run time.
- Complexity: Combining flows and LWCs can be challenging for beginners.
- Limitations in Flows: Certain use cases may require workarounds due to flow limitations (e.g., showing toast message in lwc or navigation service), which doesn’t work when flow is called from url, as the it doesn’t run in same origin rather than vf origin. Some workarounds can be used to overcome this. Workarounds for these –
- The
ShowToastEventevent does not work when the component is used in a Flow launched by a URL button. If you really need a toast, you can make your own component: https://salesforcecodex.com/salesforce/custom-toast-with-custom-duration-in-lwc/ - For redirecting from flow after finish or on cancellation specify return url in list view button url like /flow/Opportunity_SCR_MassApprove?retURL=006/o
- The
2. Using Visualforce Pages Called Through a List View URL Button
Overview:
This approach involves creating a Visualforce (VF) page and calling it directly from list view button. The VF page acts as a bridge between the list view and the LWC. The VF page opens the LWC using a URL in an Apex method. It passes the selected records’ IDs to the LWC as a query parameter.
Example Use Case :
Consider a scenario where the requirement is to bulk-update contact details for selected records based on user input. This can be achieved by creating a Visualforce Page (VF) page button in the list view. It passes the selected record IDs to an embedded LWC. The LWC displays a form for editing.
Let’s look at below example VF Page below. It is designed to enable mass updates of contacts directly from the contact list view. This is done using a custom “Update Contacts” button. This VF page retrieves the selected records’ IDs. It redirects to the LWC using a URL. The selected record ID is passed as a parameter in the LWC via the URL.
Demo –
coding example will be shared soon….
Step 1 – Create Update Multiple Contacts LWC like below :
updateMultipleContacts.html
<template>
<!-- Main card to hold the content -->
<lightning-card title="Mass Update Contacts" icon-name="standard:contact">
<!-- Conditionally render the form only if valid contacts exist -->
<template lwc:if={validConExists}>
<div class="slds-p-around_medium">
<!-- Iterate over the list of contact IDs and render forms for each -->
<template for:each={contactIds} for:item="contactId">
<div class="slds-m-around_medium" key={contactId}>
<!-- Lightning record edit form for updating a Contact record -->
<lightning-record-edit-form object-api-name="Contact" record-id={contactId} data-id={contactId}>
<!-- Layout container for fields -->
<lightning-layout multiple-rows>
<!-- Layout item for First Name field -->
<lightning-layout-item size="12" large-device-size="2" padding="around-small">
<lightning-input-field field-name="FirstName" variant="label-stacked" required>
</lightning-input-field>
</lightning-layout-item>
<!-- Layout item for Last Name field -->
<lightning-layout-item size="12" large-device-size="2" padding="around-small">
<lightning-input-field field-name="LastName" variant="label-stacked" required>
</lightning-input-field>
</lightning-layout-item>
<!-- Layout item for Mobile Phone field -->
<lightning-layout-item size="12" large-device-size="2" padding="around-small">
<lightning-input-field field-name="MobilePhone" variant="label-stacked" required>
</lightning-input-field>
</lightning-layout-item>
<!-- Container for displaying error or success messages -->
<lightning-layout-item size="12" large-device-size="2" padding="around-small">
<lightning-messages> </lightning-messages>
</lightning-layout-item>
</lightning-layout>
</lightning-record-edit-form>
</div>
</template>
<!-- Buttons for Cancel and Update All actions -->
<div style="text-align: center;">
<!-- Cancel button to navigate back to the list view -->
<lightning-button class="slds-m-top_medium" label="Cancel" variant="brand"
onclick={redirectToListView}></lightning-button>
<!-- Update All button to submit all forms -->
<lightning-button class="slds-m-top_medium" label="Update All" variant="brand"
onclick={handleUpdateAll}></lightning-button>
</div>
</div>
</template>
<!-- Render message and button if no valid contacts are found -->
<template lwc:else>
<!-- Display no eligible records message -->
No eligible records.
<div style="text-align: center;">
<!-- Button to return to the list view -->
<lightning-button class="slds-m-top_medium" label="Return to list view" variant="brand"
onclick={redirectToListView}></lightning-button>
</div>
</template>
</lightning-card>
</template>
updateMultipleContacts.js
// Import necessary modules and mixins
import { LightningElement, wire } from "lwc";
// Provides access to the current page's state
import { CurrentPageReference } from "lightning/navigation";
// Used for showing toast notifications
import { ShowToastEvent } from "lightning/platformShowToastEvent";
// NavigationMixin to enable navigation in Salesforce Lightning
import { NavigationMixin } from "lightning/navigation";

// LWC Class Definition
export default class UpdateMultipleContacts extends NavigationMixin(LightningElement) {
    contactIds = []; // Holds the array of selected Contact record IDs
    validConExists; // Boolean to check if valid contacts exist

    // Wire method to get current page state parameters
    @wire(CurrentPageReference)
    getStateParameters(currentPageReference) {
        if (currentPageReference) {
            // Extract record IDs passed as state parameter
            const recordIds = currentPageReference.state.c__recordIds;
            // Check if there are valid contacts
            this.validConExists = recordIds?.length > 0;
            if (recordIds) {
                // Decode and split record IDs into an array
                this.contactIds = decodeURIComponent(recordIds).split(",");
            }
        }
    }

    /**
     * Utility method to show toast notifications
     * @param {string} title - Title of the toast
     * @param {string} message - Message body of the toast
     * @param {string} variant - Type of toast (success, error, warning)
     */
    showToast(title, message, variant) {
        const evt = new ShowToastEvent({
            title,
            message,
            variant,
        });
        // Dispatch the toast event
        this.dispatchEvent(evt);
    }

    /**
     * Redirects user to the Contact list view
     */
    redirectToListView() {
        this[NavigationMixin.Navigate]({
            // Standard navigation type
            type: "standard__objectPage",
            attributes: {
                // Redirect to Contact object
                objectApiName: "Contact",
                // Go to list view
                actionName: "list",
                state: {
                    // Apply Recent filter in the list view
                    filterName: "Recent",
                },
            },
        });
    }

    /**
     * Handles the submission of updates for multiple Contact records
     */
    handleUpdateAll() {
        debugger;
        // Select all record-edit forms
        const forms = this.template.querySelectorAll("lightning-record-edit-form");
        // Array to hold promises for form submissions
        const updatePromises = [];

        // Iterate over each form and create a Promise for its submission
        forms.forEach((form) => {
            const promise = new Promise((resolve, reject) => {
                // Resolve on success
                form.addEventListener("success", () => resolve());
                // Reject on error with message
                form.addEventListener("error", (event) => reject(event.detail.message));
                // Submit the form
                form.submit();
            });
            updatePromises.push(promise); // Add the promise to the array
        });

        // Wait for all forms to complete submission (success or failure)
        Promise.allSettled(updatePromises).then((results) => {
            const errors = results
                // Filter out rejected promises
                .filter((result) => result.status === "rejected")
                // Collect error messages
                .map((result) => result.reason);

            // Count successful updates
            const successCount = results.filter((result) => result.status === "fulfilled").length;

            if (errors.length > 0) {
                // Show a partial success toast if there are errors
                this.showToast(
                    "Partial Success",
                    `Updated ${successCount} contacts. Errors occurred: ${errors.join(", ")}`,
                    "warning"
                );
            } else {
                // Show a success toast if all updates succeed
                this.showToast("Success", "All contacts updated successfully!", "success");
                // Redirect to the Contact list view
                this.redirectToListView();
            }
        });
    }
}
updateMultipleContacts.js-meta.xml
<?xml version="1.0" encoding="UTF-8"?>
<LightningComponentBundle xmlns="http://soap.sforce.com/2006/04/metadata">
    <apiVersion>62.0</apiVersion>
    <isExposed>true</isExposed>
    <targets>
        <target>lightning__AppPage</target>
        <target>lightning__RecordPage</target>
        <target>lightning__HomePage</target>
        <target>lightning__UrlAddressable</target>
    </targets>
</LightningComponentBundle>
Step 2 – Create the Apex Controller and VF Page :
Create the MassUpdateContacts_Controller and MassUpdateContacts_VF as below –
MassUpdateContacts_Controller.cls
/**
 * MassUpdateContacts_Controller
 * This Apex controller is designed to work with a Visualforce page using a StandardSetController.
 * It facilitates the selection of multiple Contact records from a list view and redirects the user
 * to a Lightning Web Component (LWC) with the selected Contact IDs as parameters.
 */
public class MassUpdateContacts_Controller {

    // List to store the selected Contact records from the list view
    public List<Contact> selConLst;

    // A string to hold the concatenated Contact IDs, separated by commas
    public String conIds;

    /**
     * Constructor
     * Initializes the controller with the selected records from the StandardSetController
     * and constructs a comma-separated string of Contact IDs.
     *
     * @param cntlr ApexPages.StandardSetController instance representing the standard set controller
     */
    public MassUpdateContacts_Controller(ApexPages.StandardSetController cntlr) {
        // Get the selected Contact records from the StandardSetController
        selConLst = cntlr.getSelected();

        // Initialize the concatenated Contact IDs string
        conIds = '';

        // Loop through each selected Contact to build the comma-separated list of IDs
        for (Contact con : selConLst) {
            conIds += con.Id + ','; // Append the Contact ID followed by a comma
        }

        // Remove the trailing comma from the concatenated string
        conIds = conIds.removeEnd(',');
    }

    /**
     * redirectToLWC
     * Redirects the user to the specified Lightning Web Component (LWC)
     * with the selected Contact IDs passed as a URL parameter.
     *
     * @return PageReference The URL pointing to the LWC with redirection enabled
     */
    public PageReference redirectToLWC() {
        // Construct the URL for the LWC, including the Contact IDs as a URL parameter
        String returnUrl = '/lightning/cmp/c__updateMultipleContacts?'
            + 'c__recordIds=' + conIds;

        // Create a PageReference for the constructed URL
        PageReference pgReturnPage = new PageReference(returnUrl);

        // Enable redirection to the specified URL
        pgReturnPage.setRedirect(true);

        // Return the PageReference to initiate redirection
        return pgReturnPage;
    }
}
MassUpdateContacts_VF.page
<!--
    Visualforce Page: MassUpdateContactsPage
    Purpose:
    This Visualforce page is designed to work with the `MassUpdateContacts_Controller` Apex class
    to redirect users to a Lightning Web Component (LWC) for updating multiple Contact records.
    The page uses the `StandardSetController` to handle a list view of Contact records.
-->
<apex:page standardController="Contact"
           recordSetVar="cons"
           extensions="MassUpdateContacts_Controller"
           action="{!redirectToLWC}"  />
Step 3 – Create a list view button that calls vf page on Contact like below :
a) Create List View Button – Go to setup and open contact object, then click on Button, Links and Actions and click on “New Button or Link” button, to create a list view button named “Update Contacts” as below –


b) Add the list view button to List View Button Layout


Pros:
- Compatibility: Works in environments where JavaScript buttons aren’t feasible.
- Flexibility: The VF page can handle additional processing or redirection before loading the LWC.
- Ease of Use: Familiar for orgs still transitioning to Lightning from Classic.
Cons:
- Maintenance Overhead: Requires managing both VF and LWC, which might be redundant in a full Lightning environment.
- Performance: VF pages add an extra layer, potentially increasing load times compared to native LWC solutions.
- User Experience: Visualforce styling often doesn’t align with modern Lightning UI unless customized extensively.
Both methods provide viable solutions for calling LWC from list views. They come with their own set of trade-offs. You can use Visualforce pages or flows as intermediaries. These approaches empower Salesforce users to interact with LWCs in bulk-action scenarios.

Leave a reply to Calling LWC from List Views with Selected Records in Experience Cloud Cancel reply