


Introduction:
Welcome to the latest installment of our “Learning Salesforce Flows” series. In this blog post, we’ll discuss about the basics of Salesforce Screen Flows. We’ll also discuss their pros and cons and guide you how to use them in Salesforce.
What is a Screen Flow?

A Screen Flow is a type of flow that presents the user with a series of screens or pages that allow them to interact with the flow. Each screen can include various components such as input fields, picklists, and more. Moreover, they are versatile tools that can be utilized to automate business processes, such as creating records, updating fields, and sending notifications. Additionally, they can collect user input and guide users through complex workflows, thereby simplifying tasks and enhancing productivity.
Pros and Cons of Screen Flows
Like any tool, Screen Flows have their pros and cons. Here are some of the advantages and disadvantages of using Screen Flows:
Pros
- User-friendly: Screen Flows provide a user-friendly interface. It guides users through a process. This reduces the likelihood of errors and improves the user experience.
- Customizable: Screen Flows can be tailored to meet the specific needs of your business process. This includes adding custom fields and validation rules, among other options.
- Automation: Screen Flows can be used to automate complex business processes, reducing manual data entry and improving efficiency.
Cons
- Limited functionality: Screen Flows have some limitations in terms of functionality, and may not be suitable for all use cases.
- Setup: Setting up Screen Flows can be time-consuming, and requires knowledge of Salesforce Flow and its components.
- Compatibility: Screen Flows may not be compatible with all Salesforce editions and features.
What can we do with screen flows ?
Here are some examples of what you can achieve with Screen Flows:
- Data Collection: Screen Flows are a great way to collect data from users in a structured and controlled way. You can use screen elements such as input fields, picklists, checkboxes, and radio buttons. These elements help capture data. They also provide a user-friendly experience.
- Validation and Decision Making: Screen Flows can also validate user input and perform calculations based on that input. You can use formulas, validation rules, and decision elements. These tools help ensure that the data entered by users is accurate and complete.
- Process Automation: Screen Flows can automate complex business processes, such as creating records, updating fields, and sending emails.You can use the flow elements such as Create Records, Update Records, and Send Email. These tools help automate your business processes. They reduce manual effort.
- Improved User Experience: Screen Flows provide a streamlined user interface. They guide users through a series of steps. This helps to complete a task or process efficiently. By using screens, flow elements, and conditional logic, you can create a user-friendly and efficient experience for your users.
- Integration with External Systems: Screen Flows can also integrate with external systems to retrieve data, validate input, and update records. You can use Apex actions, REST API calls, and other integration methods. These methods extend the functionality of your flows. They help create seamless user experiences.
How to Create a Screen Flow
Now, let’s walk through the process of creating a Screen Flow in Salesforce.
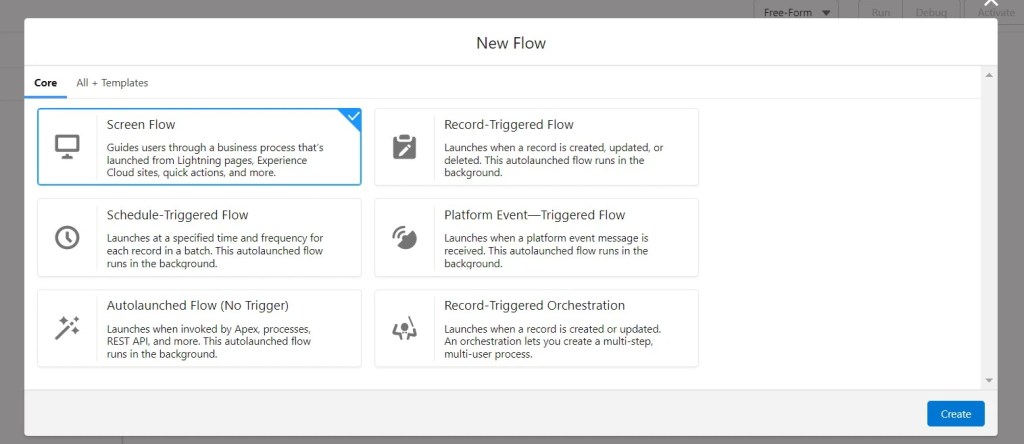
Step 1: Create a Flow
To create a Screen Flow, you’ll need to create a new Flow in Salesforce. To do this, navigate to Setup > Process Automation > Flows, and click New Flow. Then, Select Screen Flow template and click Create.

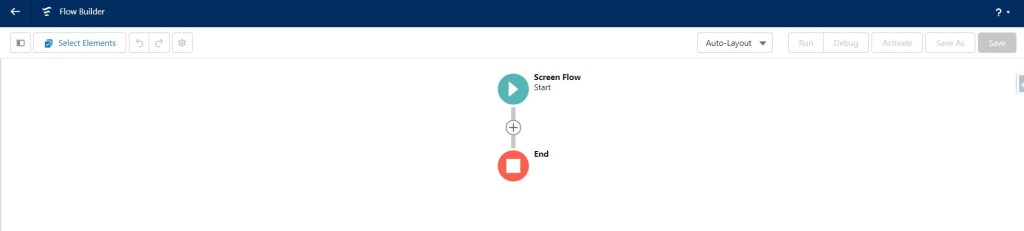
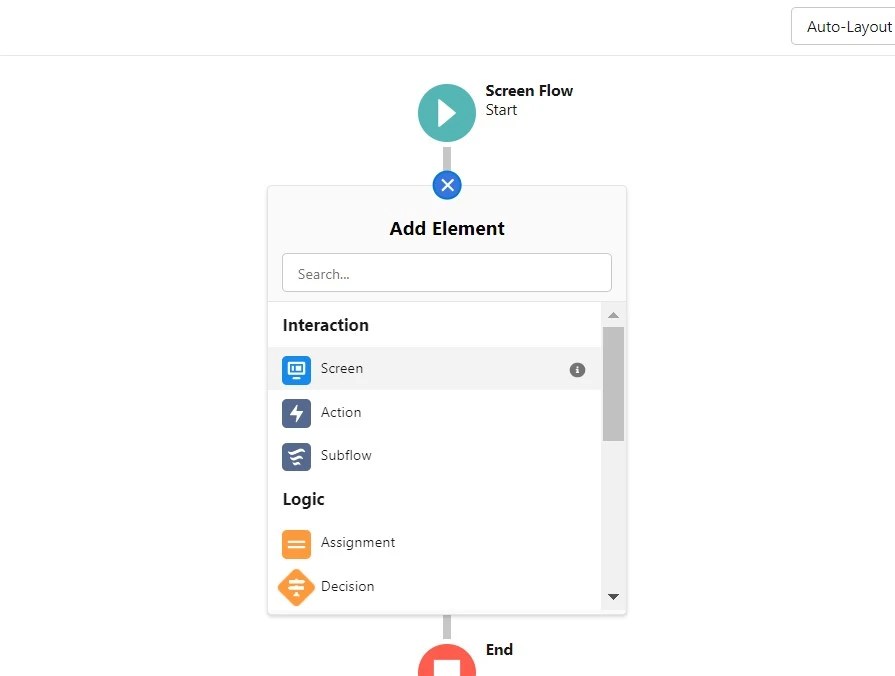
Step 2: Add a Screen Component
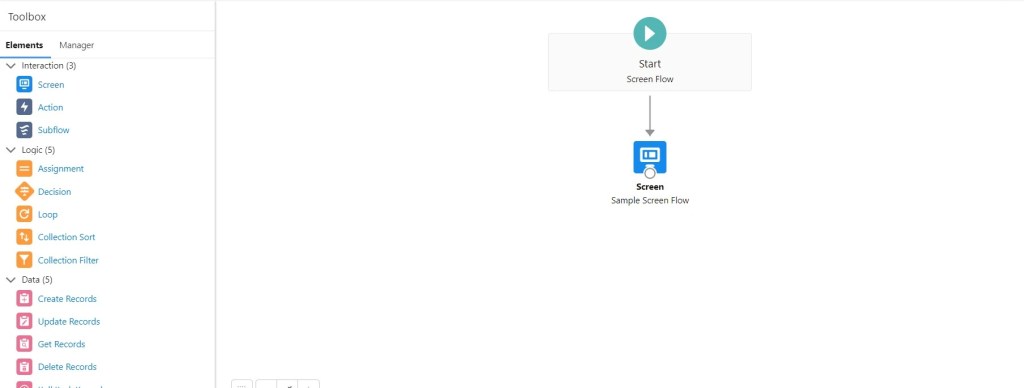
Once you’ve created a new Flow, you’ll need to add a Screen component. To do this, drag the Screen component from the Palette onto the canvas in free form layout. Or If you are using auto-layout, click on add button to add a Screen Component.
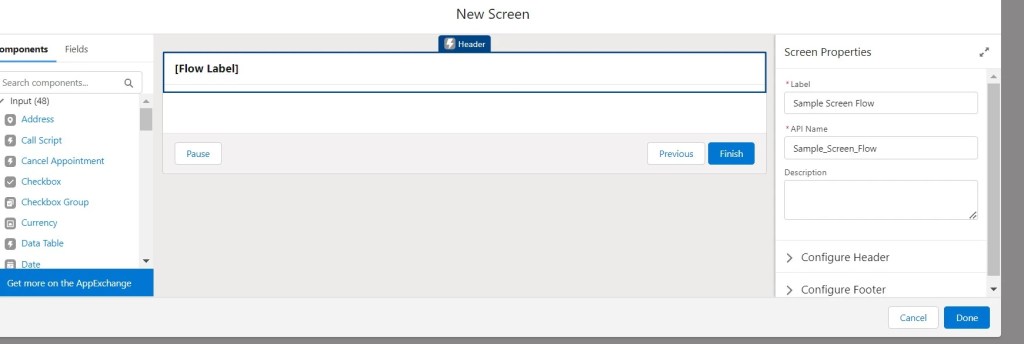
Step 3: Configure the Screen Component
After adding the Screen component, you’ll need to configure it by adding fields, buttons, and other components as needed. To do this, follow these steps:
- On the Screen component and use the Properties panel to make changes.
- Click on the screen element you added in the previous step to open the Screen Designer.
- Use the palette on the left to add components to the screen. You can include components like input fields, picklists, checkboxes, and radio buttons.
- Customize the appearance and behavior of the screen elements as needed.
- Add additional screens to the flow by clicking the Add Screen button at the bottom of the Screen Designer.
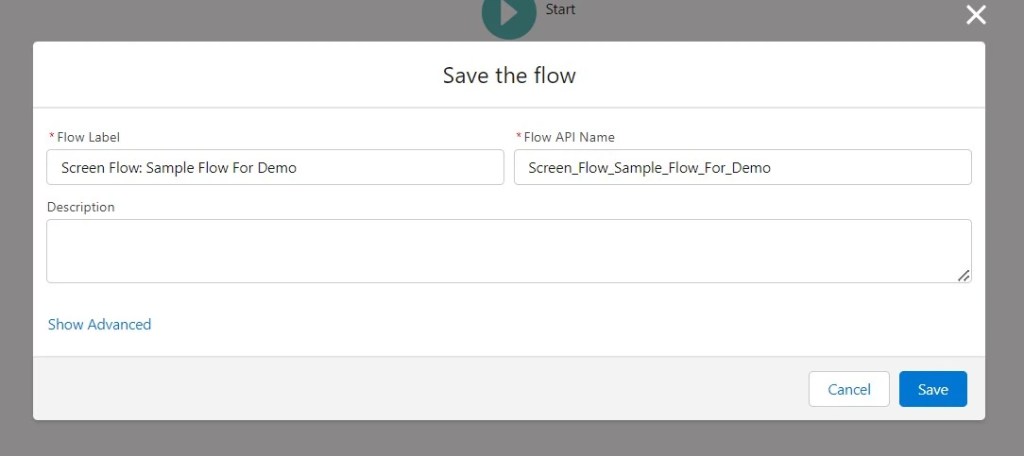
- Then, click on save to save the flow. For flow naming conventions best practices, please see our previous post – Learning Salesforce Flows – Part 2 – Flow Naming Conventions Suggestions & Best Practices
Step 4: Define the Flow Elements
Define the flow elements, such as variables, formulas, decisions, and actions, that you will use in your Screen Flow.
In the Flow Designer, add the flow elements you need. Drag them from the palette on the left. Drop them onto the canvas on the right.
Step 5: Define the Flow Logic
Define the flow logic by adding decision elements and connecting the screens and flow elements. To do this, follow these steps:
- Add decision elements to the flow by dragging them from the palette and dropping them onto the canvas.
- Connect the decision elements to the screens and flow elements. Drag connectors from the decision element to the next element in the flow.
- Define the conditions that determine which path the flow takes by setting up the decision logic.
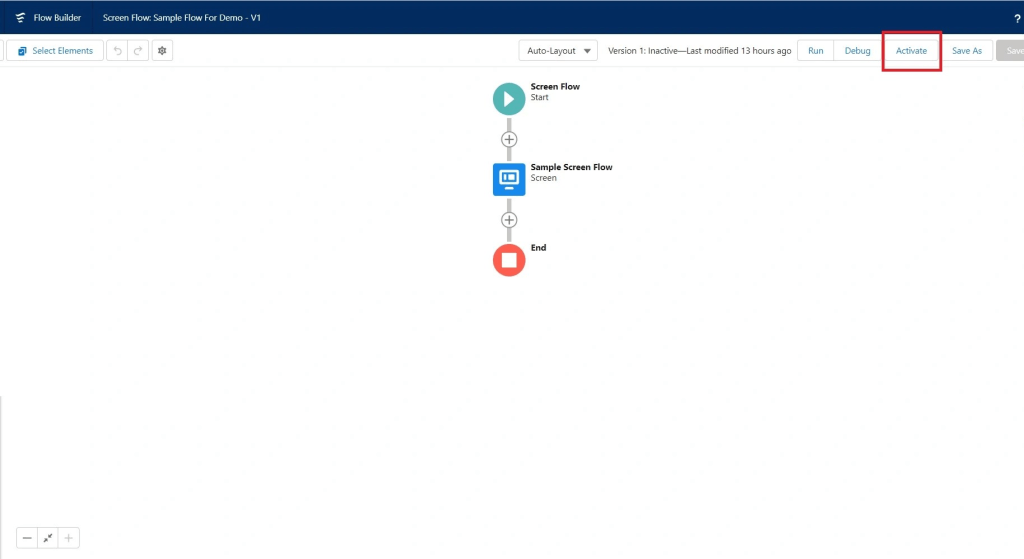
- Test your flow by clicking the Preview button and following the flow through each screen and element.
Step 6: Activate the Flow
Finally, once you’ve completed your Screen Flow, activate the flow by clicking activate button.
Here is an amazing article on creating and using Screen Flows – https://salesforce-flowsome.com/flow-how-to-use-screen/
For more helpful articles please visit – https://thesalesforcedev.in

Leave a reply to Mohit Cancel reply