

Introduction
Salesforce Flows are powerful tools for automating processes. While their out-of-the-box capabilities are extensive, there are times when custom logic is required. This is where Apex Actions come into play. By leveraging Apex in Flows, you can achieve unparalleled flexibility and extend Salesforce’s functionality to meet complex business requirements.
What Are Invocable Actions?
An Invocable apex action is a way to call a custom apex method withing a Flow. This allows developers to write reusable, scalable code in Apex and make it available to declarative admins through Flows.
Invocable Actions let’s you package custom Apex logic as reusable “actions” in declarative tools—most notably Flow Builder. Under the hood, Salesforce scans for methods annotated with @InvocableMethod. It exposes them in the Flow canvas. You simply map inputs and outputs like any other element.
The Invocable actions can be called from Screen Flows and Autolaunched flow.
@InvocableMethod Annotation
Use @InvocableMethod to flag a static Apex method as a Flow-callable action. Key rules include:
- Static & Public/Global: The method must be
public static or global static, in an outer class. - One per Class: Only one
@InvocableMethodmethod should be there per class - Callout = True: If your method makes HTTP callouts, add
callout=trueto avoid runtime errors in Flow. - SFDC Documentation
Example Code –
public class AccountQueryAction {
  @InvocableMethod(label='Get Account Names' description='Returns the list of account names corresponding to the specified account IDs.' category='Account')
  public static List<String> getAccountNames(List<ID> ids) {
    List<Account> accounts = [SELECT Name FROM Account WHERE Id in :ids];
    Map<ID, String> idToName = new Map<ID, String>();
    for (Account account : accounts) {
      idToName.put(account.Id, account.Name);
    }
    // put each name in the output at the same position as the id in the input
    List<String> accountNames = new List<String>();
    for (String id : ids) {
      accountNames.add(idToName.get(id));
    }
    return accountNames;
  }
}
@InvocableMethod Annotation Considerations
Below are the high level considerations :
- Single Input Argument: You can declare at most one input parameter to the method. This parameter can also be a collection.
- Single Return Value: The method should return either a single value or a single list of values.
- Wrapper Classes for Multiple Fields: To accept multiple values in one invocation, define an inner Apex class. You can also return multiple values this way. This class should have multiple
@InvocableVariablefields. UseList<YourWrapper>as the method signature. - Input-Output Size Matching: Ensure the method’s output collection has the same size as the input collection.For example, if 10 records are passed to the method, the returned collection must have 10 corresponding results. Each one will represent a success, an error, or a default value. Mismatched sizes can lead to the Flow Error – “The number of results does not match the number of interviews that were executed”.
- Governor-Safe Bulk Processing: Always design your invocable method to accept and return collections. This enables Flow to bundle inputs. It also helps to avoid per-record DML or SOQL limits.
- Governor Limits Apply: Invocable methods are subject to the same CPU limits. They also have the same SOQL, DML, and heap limits as any other Apex code.
- No SOQL/DML/Approval Hooks: You cannot embed an invocable method directly inside SOQL queries, DML triggers, or approval processes.
- Error Handling: Surface meaningful exceptions back to Flow using
FlowExceptionor by returning status indicators in your wrapper type.
@InvocableVariable Annotation
Within your class, wrap inputs/outputs in inner classes whose fields are tagged @InvocableVariable Rules for those variables:
- Must be
publicorglobalinstance variables (no static, final, or private). - Data types allowed: primitives, sObjects, lists (and lists of lists) of those types or Apex-defined classes.
- In managed packages,
globalvariables appear in subscriber org Flows;publicones are limited to the same package namespace.
@InvocableVariable Annotation Considerations
Within your class, wrap inputs/outputs in inner classes whose fields are tagged @InvocableVariable. Below are the high level considerations for those variables:
- Must be
publicorglobalinstance variables (no static, final, private variable and property). - Data types allowed: primitives, sObjects, lists (and lists of lists) of those types or Apex-defined classes.
- Name in Apex must match the name in the flow
- SFDC Documentation
Example Code –
@InvocableVariable(label='yourLabel'
 description='yourDescription' placeholderText='yourPlaceholderText'
 required=(true | false))
public String myString;

@InvocableVariable(defaultValue='hello world!')
public String myString;
When to Use Apex Actions in Flow
Below are some of the use cases –
1. Complex Business Logic
Flows excel at linear, straightforward processes. When you need branching logic with nested loops, advanced calculations, or algorithmic operations, Apex is the solution. Invocable Apex methods can encapsulate this complexity in a single reusable action. They keep your Flow canvas clean and maintainable.
2. Bulk Data Processing and Performance
Flows hit limits when dealing with large record collections—such as the 2,000 element execution cap or CPU time constraints. Apex can handle bulk operations more gracefully. It leverages efficient collections processing. It minimizes DML calls in a single transaction. For very large volumes (LDV), Apex remains performant where Flow would timeout or require splitting into multiple transactions.
3. External Callouts and Integrations
Standard Flow elements cannot perform HTTP callouts. Any callout to external systems (REST APIs, SOAP services) necessitates Apex annotated with @InvocableMethod(callout=true). This flag notifies the Flow runtime to pause and resume around the callout, preventing “mixed DML” or transaction errors.
4. Advanced Queries and Transaction Control
Complex SOQL queries with relationships, aggregate functions, or selective locking (FOR UPDATE) are beyond Flow’s declarative capabilities. Apex allows you to craft efficient queries, manage transaction boundaries, and handle partial failures with fine-grained error handling.
5. Security and Access Control
When invoking Apex, you can enforce sharing rules. You can perform CRUD/FLS checks in code. With sharing classes can be leveraged for secure data access. This ensures that complex operations still honor the user’s permissions, something that’s more challenging to guarantee with Flow alone.
6. Reusability, Testability, and DevOps
Apex code can be version-controlled, code-reviewed, and unit-tested, ensuring higher quality and maintainability. Invocable methods serve as modular, reusable services for multiple Flows. In contrast, Flow logic is stored as XML metadata. This can make it harder to track and test via CI/CD pipelines.
How to Set Up Apex Actions for Flows
- Write the Apex Class
- The class must be global or public.
- Annotate the method with
@InvocableMethodto make it accessible in Flows. - The method must return
voidor aListof custom types annotated with@InvocableVariable.
- Expose Parameters and Results
- Use
@InvocableVariablefor input and output parameters.
- Use
- Deploy the Class
- Once deployed, the method becomes available as an Apex Action in the Flow Builder.
- Add to Flow
- Drag and drop the Apex Action onto the Flow canvas.
- Configure the input and map the output as required.
Pros and Cons of Using Apex Actions in Flows
Pros:
- Flexibility: Allows for complex logic that can’t be achieved with declarative tools.
- Reusable Logic: Apex methods can be reused in multiple Flows.
- Improved Performance: Handles bulk processing more efficiently than some Flow operations.
- Integration Capabilities: Enables API callouts and external integrations.
Cons:
- Developer Dependency: Requires coding skills and deployments.
- Debugging Complexity: Troubleshooting issues may require logs and developer tools.
- Limited Visibility: Logic hidden in Apex can reduce visibility for non-technical admins.
- Maintenance Overhead: Changes require updates to both Apex and Flows.
Best Practices
- Keep Apex Actions Simple: Write small, focused methods for specific tasks.
- Error Handling: Implement robust error handling and return meaningful messages to the Flow.
- Test Thoroughly: Ensure 100% code coverage and handle bulk scenarios.
- Use Declarative Tools First: Only use Apex when declarative capabilities are insufficient.
Example Use Cases –
Imagine a university admissions office that uses Salesforce to manage student data. They often need to fetch and review student information from an external system (e.g., a third-party student database) based on the university name. Instead of storing the data permanently in Salesforce, they want to display it dynamically in a Flow for decision-making purposes.
The StudentApiCalloutAction Apex class functions as an Invocable Action. It fetches student details from an external API. Then, it organizes them into a list of Salesforce Contact records. The results are displayed in a Flow’s datatable, enabling users to view the data in real-time.
Imagine a university admissions team that uses Salesforce to manage student data dynamically fetched from an external system. The team prefers not to store this data in Salesforce permanently. They want to view the information in real-time during a Flow execution. Each university has a list of associated students, and the goal is to display these student details (e.g., names, emails, phone numbers) in a Flow datatable. For example:
- Fetching Student Data:
The admissions team inputs “”University of Illinois” and “Syracuse University” into a Flow. The system should fetch student data. It should retrieve student data. This includes entries for both universities. It should retrieve all students associated with these universities. The system will fetch the student data. It will retrieve the data dynamically from an external API. - Data Processing:
The external API provides detailed student information in a JSON format. The Flow organizes this data into SalesforceContactobjects, where each Contact represents a student. These records include fields likeFirstName,LastName,Email,Phone, andUniversity__c. - Displaying Data in Flow:
The system displays the retrieved data in a datatable in the Flow. For example:- University of Illinois: Displays students named Alexander, Logan, and Henry along with their emails and phone numbers.
- Syracuse University: Displays students named Ethan, Chloe, and Addison along with their emails and phone numbers.
- Error Handling:
If the API fails or encounters an issue (e.g., invalid university name or network error), the Flow gracefully handles the error, ensuring no disruption in user experience.
This use case ensures that the admissions team can efficiently access and review student data from multiple universities. This is done during decision-making processes without manually interacting with external systems. The StudentApiCalloutAction class automates this process, improving workflow efficiency and data accuracy.
We will be using https://dummyjson.com/users api, to fetch student details for this example.
Implementation –
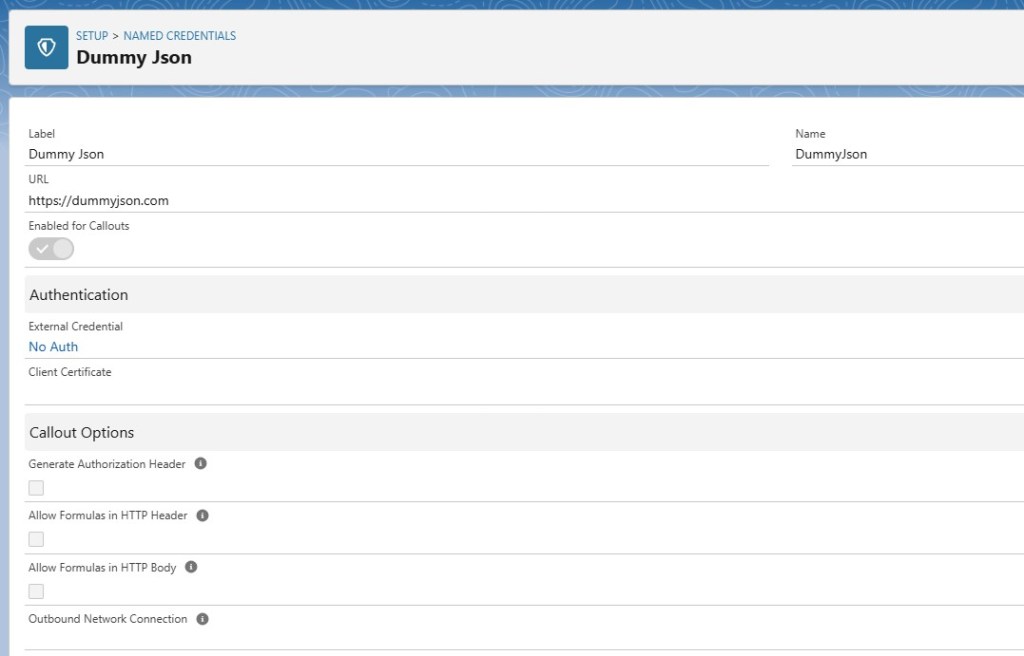
Step 1 – Create a Named Credential For Dummy Json Api
First, let’s create a Named Credential named “Dummy Json” with External Credential Authentication as “No Auth”.
a) Create a External Principal as No Auth and New Principal.


b) Create the name credentials with api end point and linked the external credentials.
Step 2 – Create an Apex Class Named “StudentApiCalloutAction”
Second, let’s create a class in Apex that we’ll use to as an action in Flow.
Class Overview:
This is a Salesforce Apex class. It performs a callout to an external API. The purpose is to fetch user data based on the university name provided as input. It processes the API response and organizes the data into a list of Contact records.
What it Does:
- Fetches user data from an external API using an HTTP GET request.
- Deserializes the JSON response into a structured format.
- Maps each university name to its corresponding
Contactrecords. - Returns a list of lists of
Contactrecords, where each inner list corresponds to a university name.
When it Runs:
This class is intended to be invoked from:
✨ Salesforce Flows (via the @InvocableMethod annotation)
How It Works:
Here is a step-by-step explanation of what the StudentApiCalloutAction class does:
- Input Parameter Handling:
- The method accepts a list of
ActionInputobjects. - Each
ActionInputcontains the name of a university. - Unique university names are collected in a
Set.
- The method accepts a list of
- Simulating Exceptions for Testing:
- A
simulateExceptionflag is provided for testing error scenarios. - If set to
true, a custom exception (SimulatedException) is thrown to simulate an error during API calls.
- A
- Making the API Call:
- Creates an HTTP GET request using Salesforce’s
HttpRequestclass. - Sends the request to an endpoint defined in Named Credentials (
callout:DummyJson/users).
- Creates an HTTP GET request using Salesforce’s
- Processing the API Response:
- Checks the HTTP response status. If the status code is
200 (OK), it deserializes the response body into a map. - Extracts the
usersfield and maps the data intoContactrecords. - Each
Contactrecord includes fields likeFirstName,LastName,Email,Phone, andUniversity__c.
- Checks the HTTP response status. If the status code is
- Organizing Contacts by University:
- Populates a map where each key is a university name, and the value is a list of corresponding
Contactrecords.
- Populates a map where each key is a university name, and the value is a list of corresponding
- Generating the Output:
- Loops through the original input list.
- For each university name, adds the corresponding list of
Contactrecords to the result. - Ensures the output maintains the same order and size as the input.
- Error Handling:
- Uses a
try-catchblock to handle exceptions. - Logs exception details and rethrows a custom exception for better error visibility in flows.
- Uses a
- Returning Results:
- Returns a list of lists of
Contactrecords. Each inner list corresponds to the data fetched for a university.
- Returns a list of lists of
Key Features:
- Invocable from Flow: The
@InvocableMethodannotation allows this class to be called from Salesforce flows or Process Builder. - Custom Input Class: Uses the
ActionInputinner class to define parameters for the invocable method. - Error Simulation: Provides a mechanism to simulate exceptions for robust testing.
- Named Credentials: Simplifies endpoint management and ensures secure API access.
Step 3 – Create a Screen Flow to Use above Apex Class as an Action
Next, let’s create a Flow in Salesforce. This Flow will invoke our apex class as an action. It will then show the result in the data table.
a) Create a new screen flow and add action element.
b) Search for our apex action Get Student Data and add the action.

c) Create a new text variable named “varT_UniversityName” and check avalaible for input option. This variable will be the input parameter to this screen flow.

d) Create a new record variable named “varR_ContactDetails”, which will be used to store the result from the apex action, which will be list of contacts (List<Contact>);

e) Set the “varT_UniversityName” variable as the input to the apex action.
f) Click on show advance options section in apex action and click on Manually assign variable checkbox. Then set “varR_ContactDetails” variable as output, to store the apex action result.

g) Add a new screen element and add the data table component to it.

h) Add the columns to be displayed in data table, returned from API Call, like first name, last name etc.


i) Click on “Save” button in flow toolbar to save the flow.

j) The final screen flow should look like below –


Leave a comment